• Banff National Park

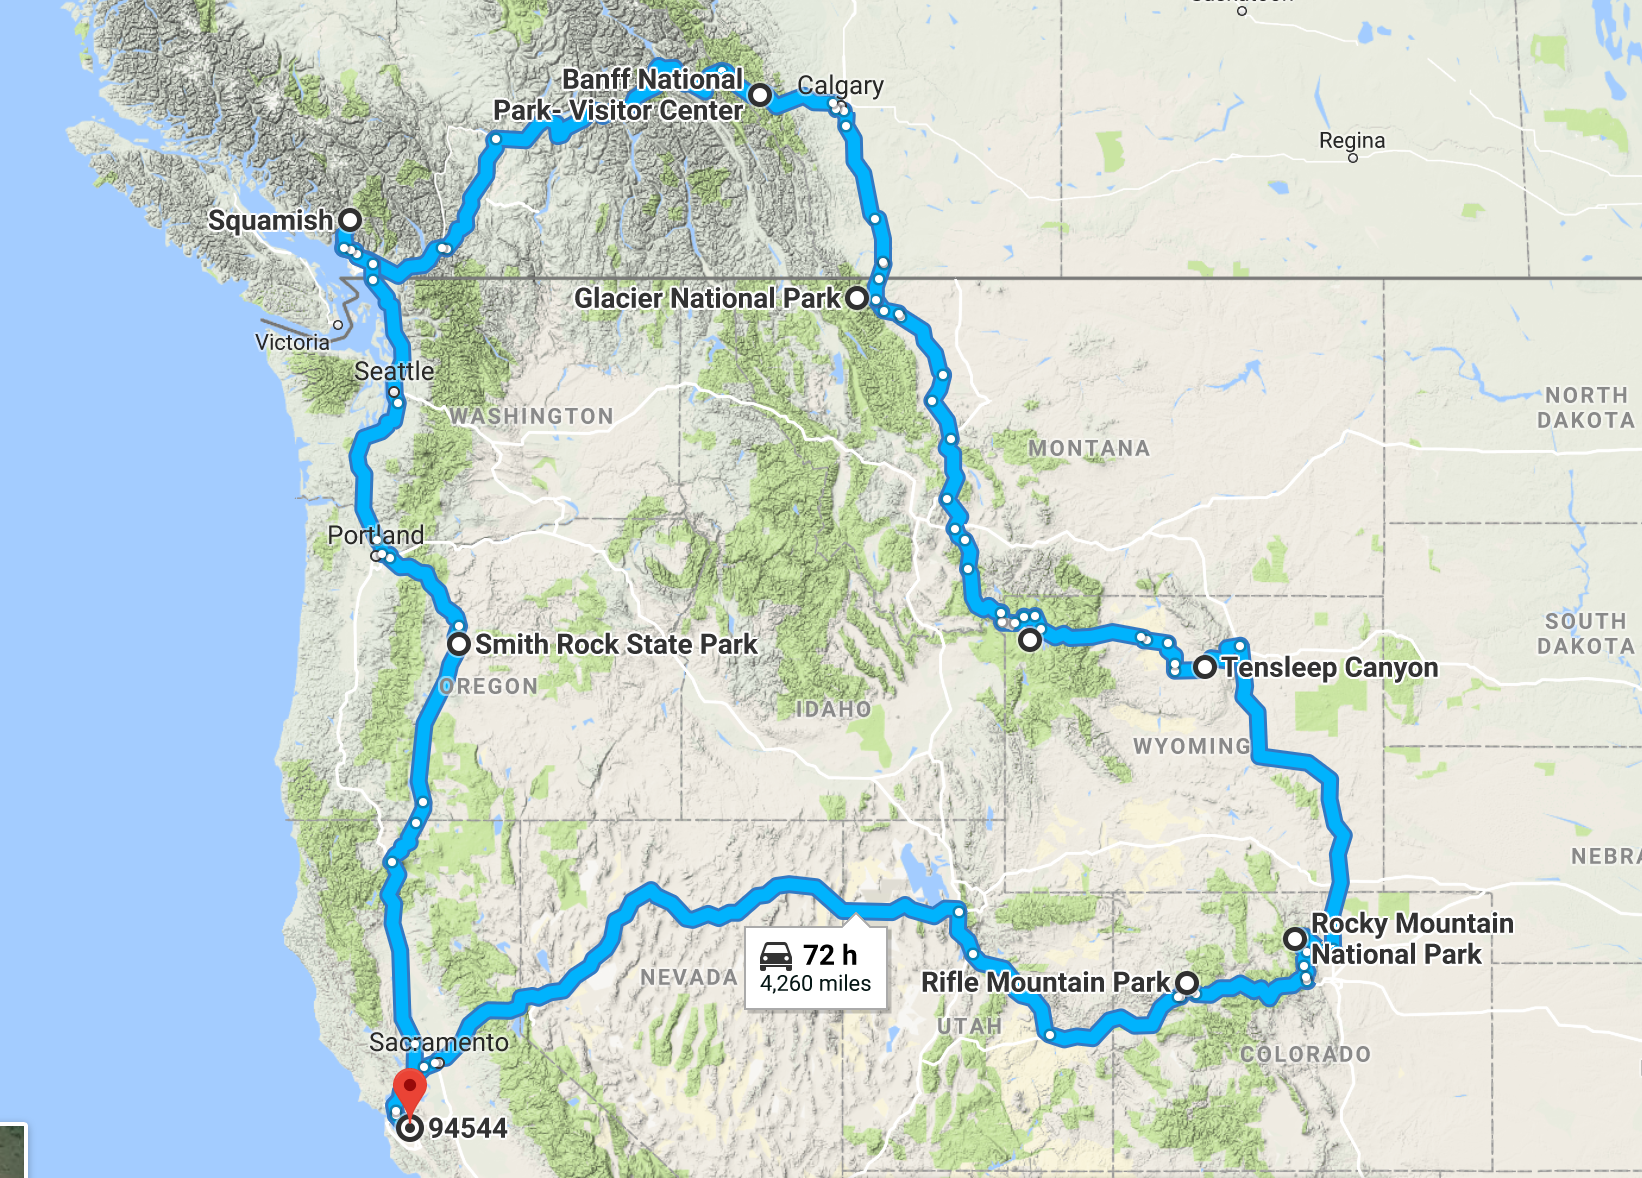
    After some climbing in Ten Sleep, Wyoming and exploring Yellowstone and Glacier National Parks we crossed the Canadian border to Alberta, Canada.  We spent one night camping at a Walmart in Calgary.  Then we headed straight to Banff National Park the next morning.  Since we were determined to meet friends in Squamish, we only had three days to spend here.  I wish it was longer, but this is one of the national parks I will have to return to. 

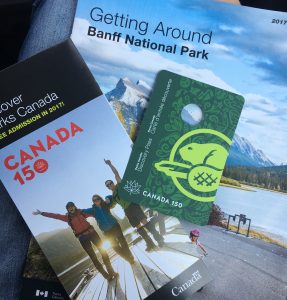
    When we entered the park, we were extremely lucky as 2017 marks the 150th Anniversary of Canada.  150 years ago, Quebec, Ontario, New Brunswick and Nova Scotia – united to create the Canadian Confederation, called the Dominion of Canada.  Per the British North America Act, these British colonies would be recognized as an independent nation.  In honor of their 150th anniversary, all of the national parks had free admission for the entire year. 

    Climbing

    There is so much climbing in the Canmore area.  We only had a chance to explore the rock climbing around Lake Louise.  It was August when we were here, so the area was hot.  Luckily the climbing area gets shade in the afternoon, so climbing here was more bearable.  I was still recovering from an A1 pulley finger injury so I did not get to do as much climbing as I would have hoped.  Unfortunately, since it’s typically only the two of us climbing I have no pictures from this trip. 🙁

    Camping

    It was the beginning of August and prime summer season in Banff.  We entered the national park with no camping reservations and decided to stop at multiple campgrounds in the morning to see if they had any availability:

    • Tunnel Mountain Village: We first went to Tunnel Mountain Village since they have >600 campsites.  The campsites are located near the town of Banff and are a little more expensive since all sites include showers.  We figured since this was the largest campground there would be a better chance of availability.  WRONG!  They were completely booked. 
    • Two Jack Lakeside: Also full.  Showers are included with nightly fee. 
    • Two Jack Main: SCORE!  There was a morning cancellation and the ranger said the campsite we stayed at would be available for two nights.  Since we didn’t have to pay for admission fee into the park, we took it.  The Two Jack Main campsite was cheaper, but there were no showers available at this campsite (hence the cheaper nightly fees).  If you don’t want to fly to Banff with your camping gear, this campground also offers “equipped sites” with all of the necessary camping equipment for a higher fee.  See Banff National Park’s camping for more information. 

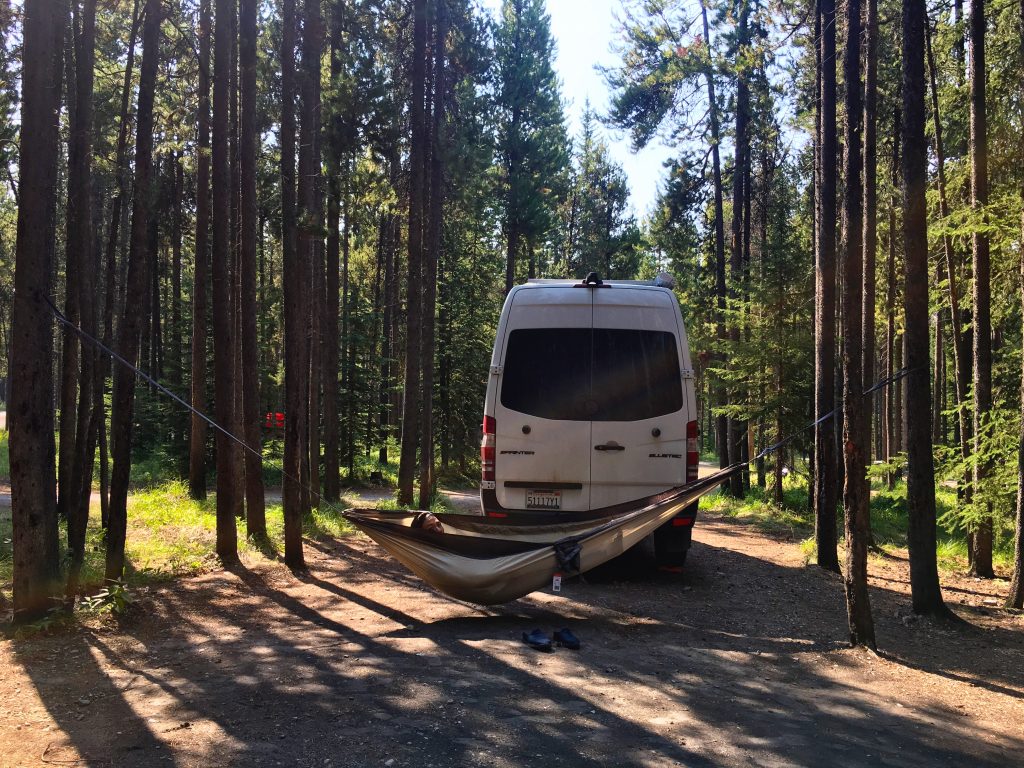
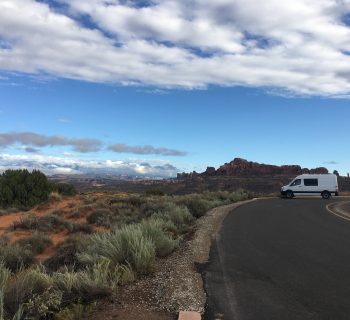
    • Lake Louise Overflow Parking:  If you are in an RV or a van and find yourself in a position where all of the campsites are available, there is an overflow parking area in Lake Louise where you can stay overnight for a small fee (~$10/night – 2017).  No tents are allowed.  It is essentially a gravel parking lot with a pit toilet.  We stayed here for one night on a Friday night in August.  We got to the overflow parking area around 9pm and the parking lot was almost entirely full.  We got one last spot for our “small” van.  It was quiet and we would definitely stay here again since we rarely use most of the amenities offered in a standard campsite. 
    • If you go in the morning to each of the campsite check in stations, you might be able to snag a campsite even during peak season! 

    Water Fill:  Since we camped at the National Park for most of our time, we did not need a water fill.  We used the potable water and communal sink in the campground. 

    Showers:  At Two Jack Main, there were no showers available.  We showered at the Sally Borden Fitness and Recreation Center.  It was a little more expensive compared to other recreation centers we’ve visited, but the place was clean.  In addition, you can also utilize their WIFI in the lobby. 

    Laundry: We went to “Cascade Coin Laundry” in the town of Banff.  The laundromat was nice and clean, but a little more on the expensive side compared to all of the other laundromats we’ve been to.  We managed to score a parking spot in the lot nearby so we didn’t have to drag our laundry too far.  

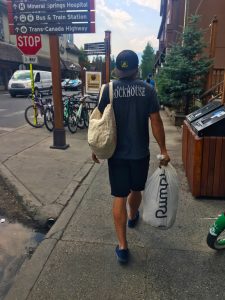
    Parking in the Town of Banff:  We did manage to find some street parking  and there are a couple of lots for RVs, but parking spots are limited.  

    Food and Drinks

    We didn’t eat much in the town of Banff.  We mostly cooked back in camp so I don’t have many recommendations for this place. 

    Rest Day Activities / Things to Do in Banff

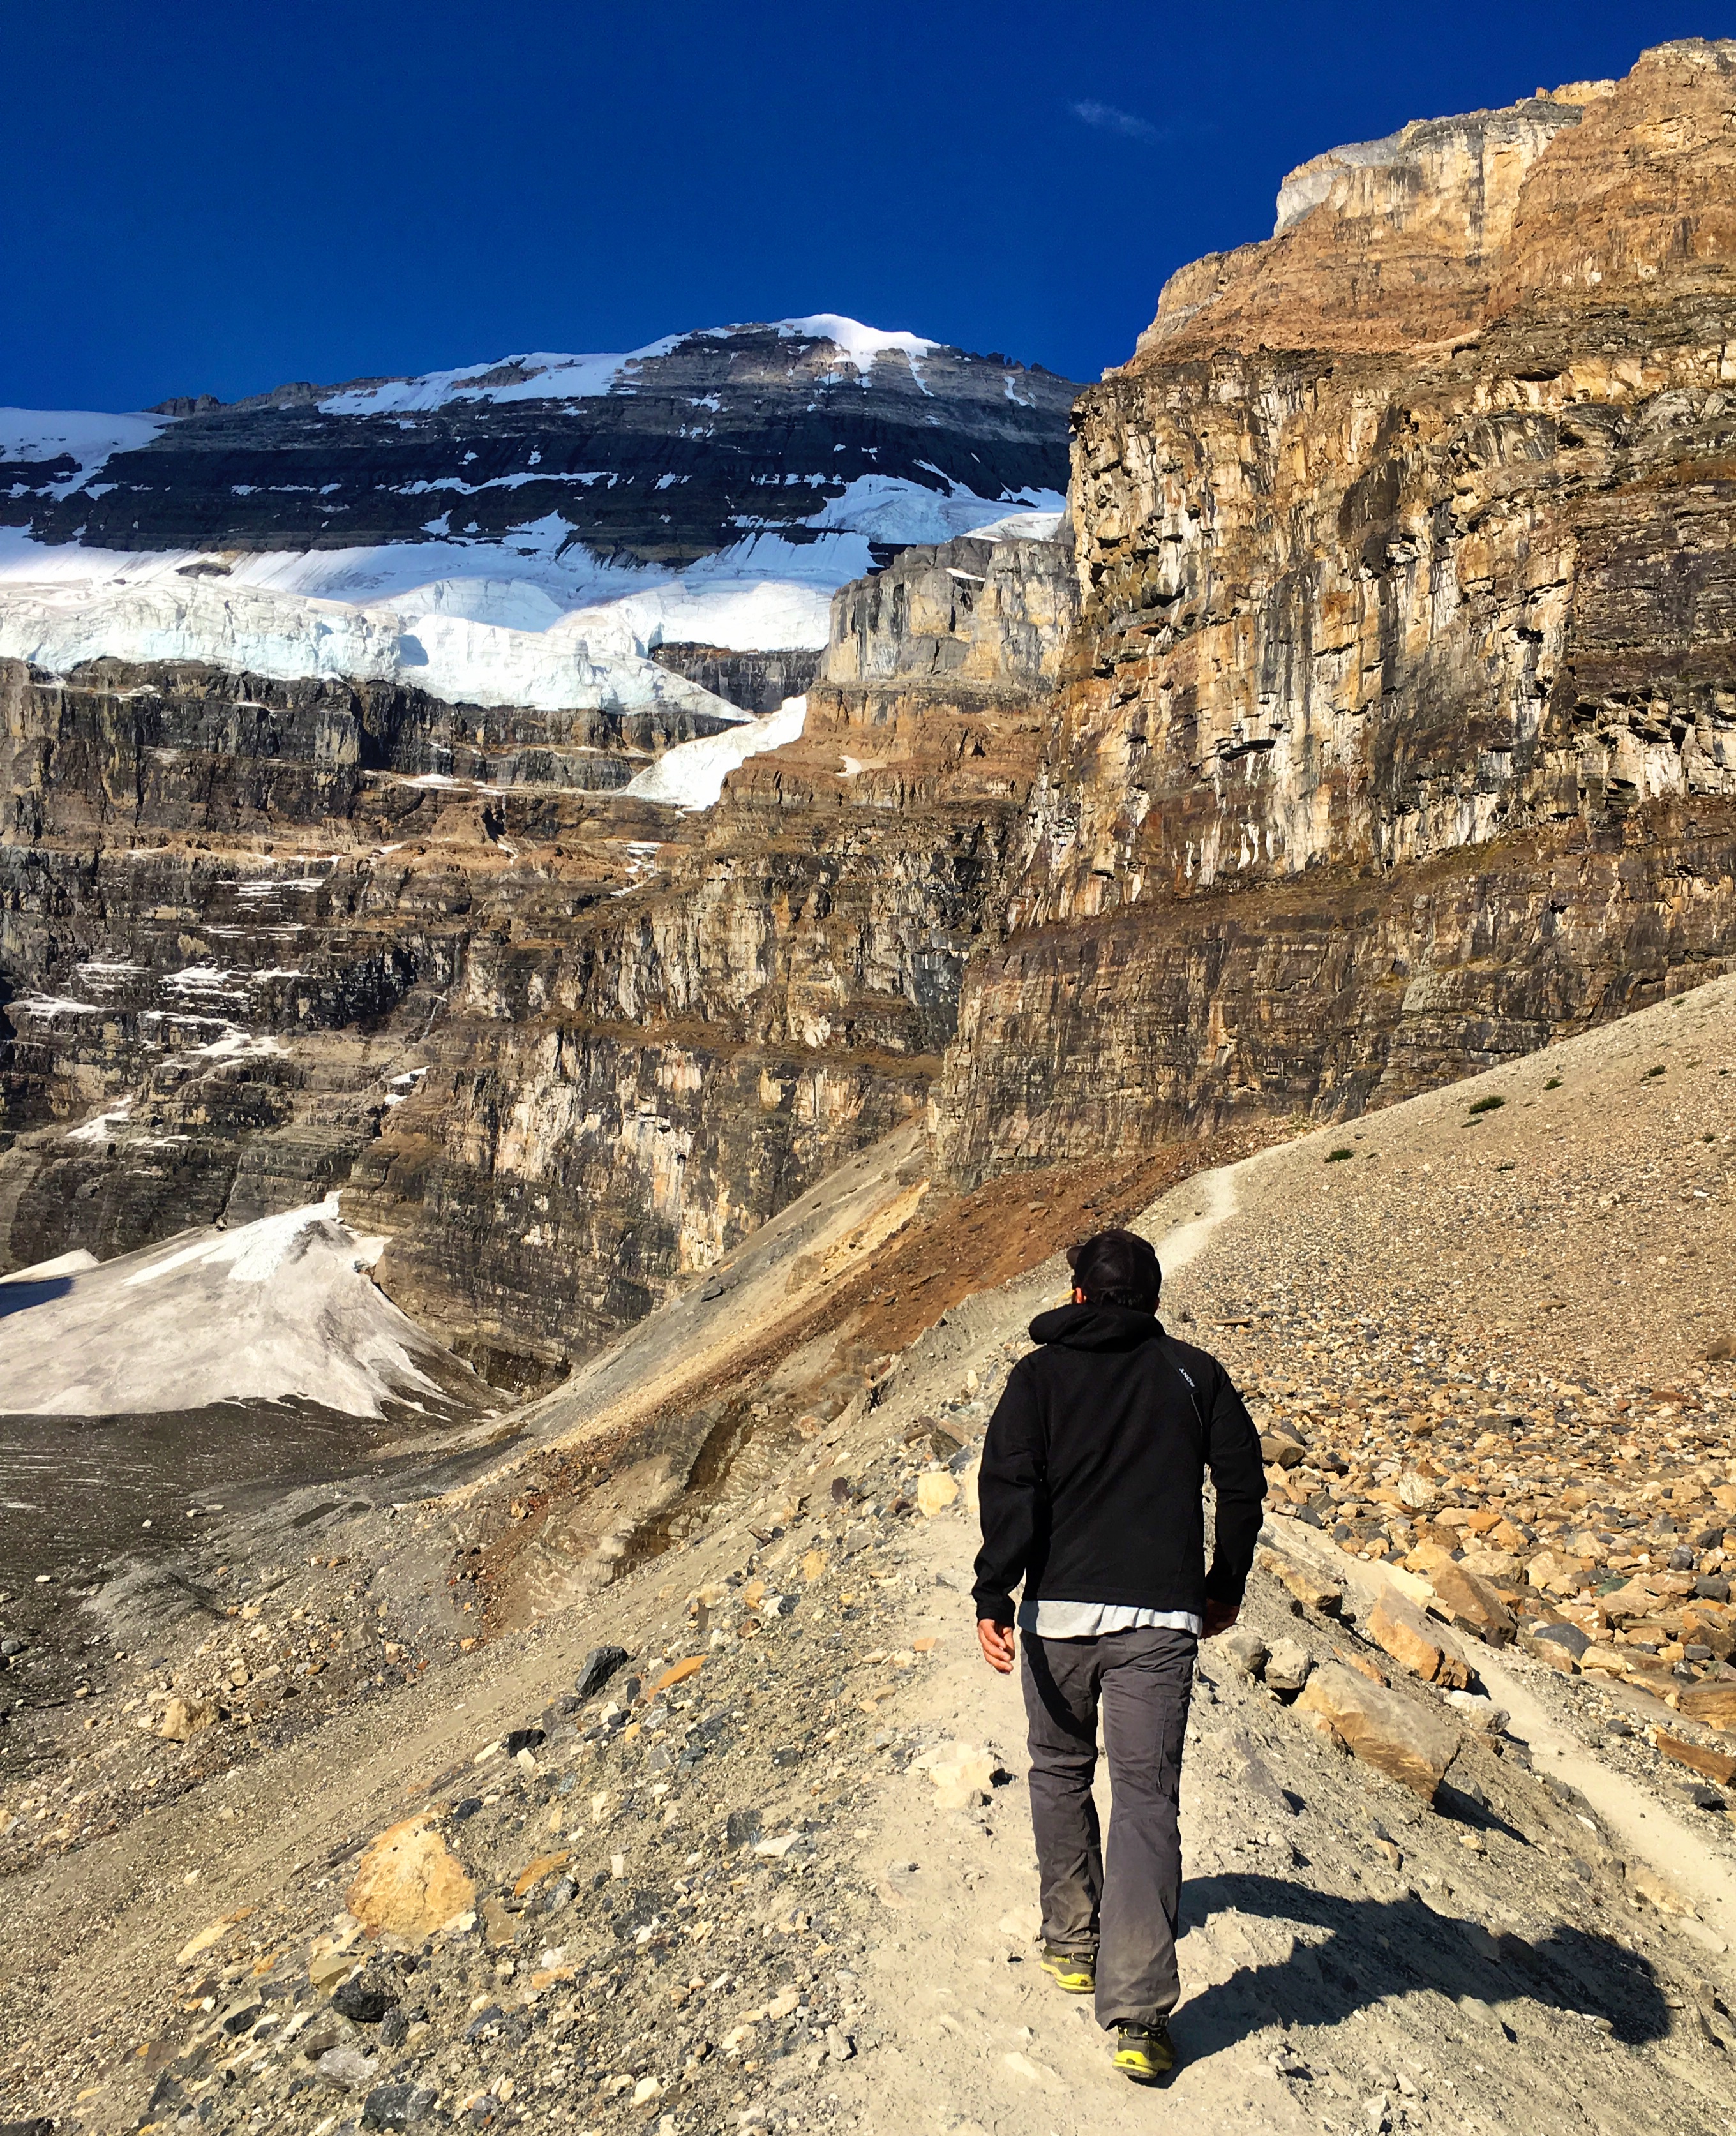
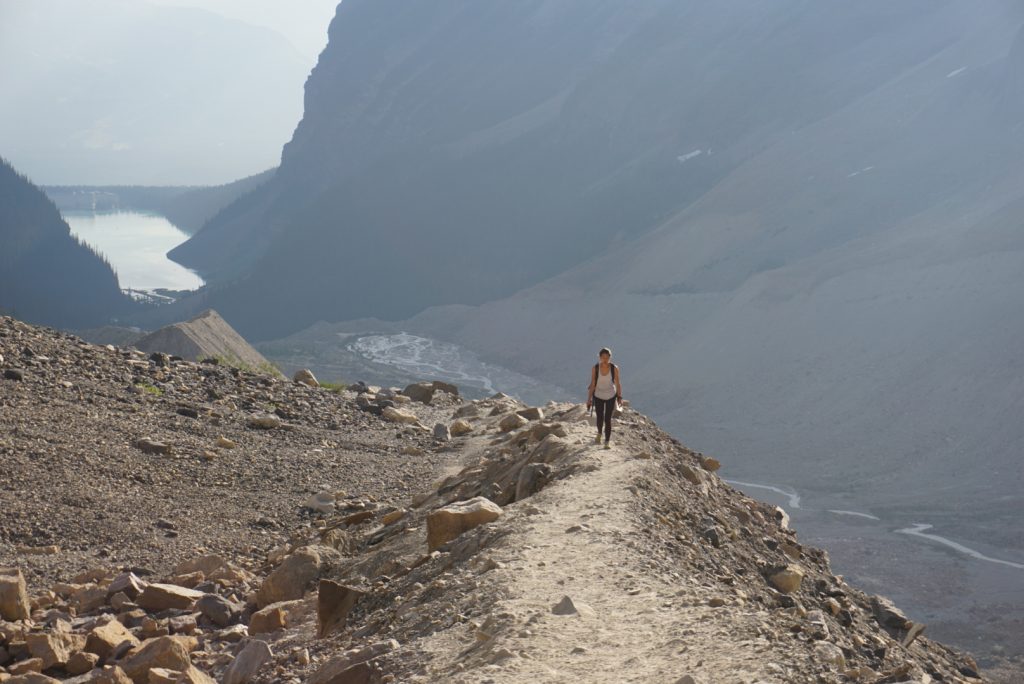
    (1) Hike to the Plain of the Six Glaciers:  From Lake Louise, you can see the Upper Victoria Glacier.  The trail gets you a closer view of Mount Lefroy, Mount Victoria and the Victoria Glaciers.  In addition, you can visit the Plain of Six Glaciers teahouse after your hike! 

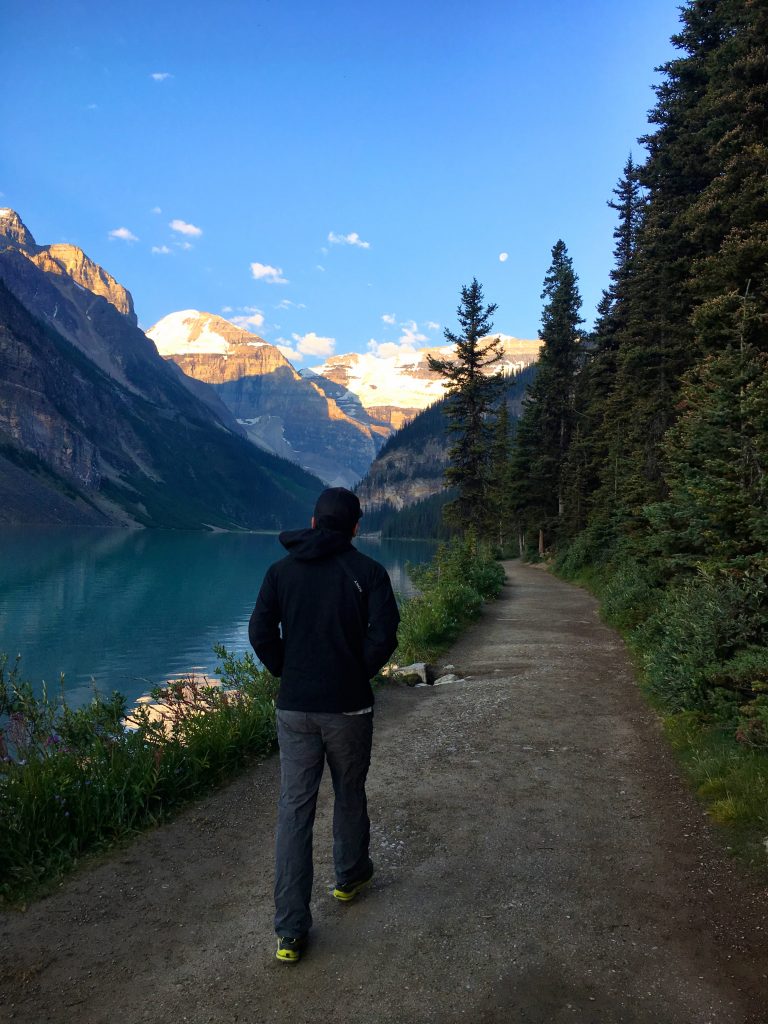
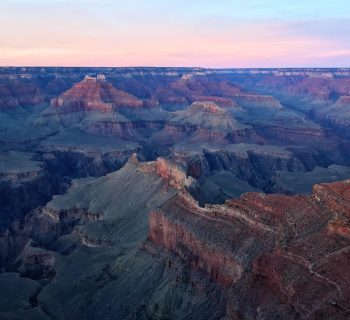
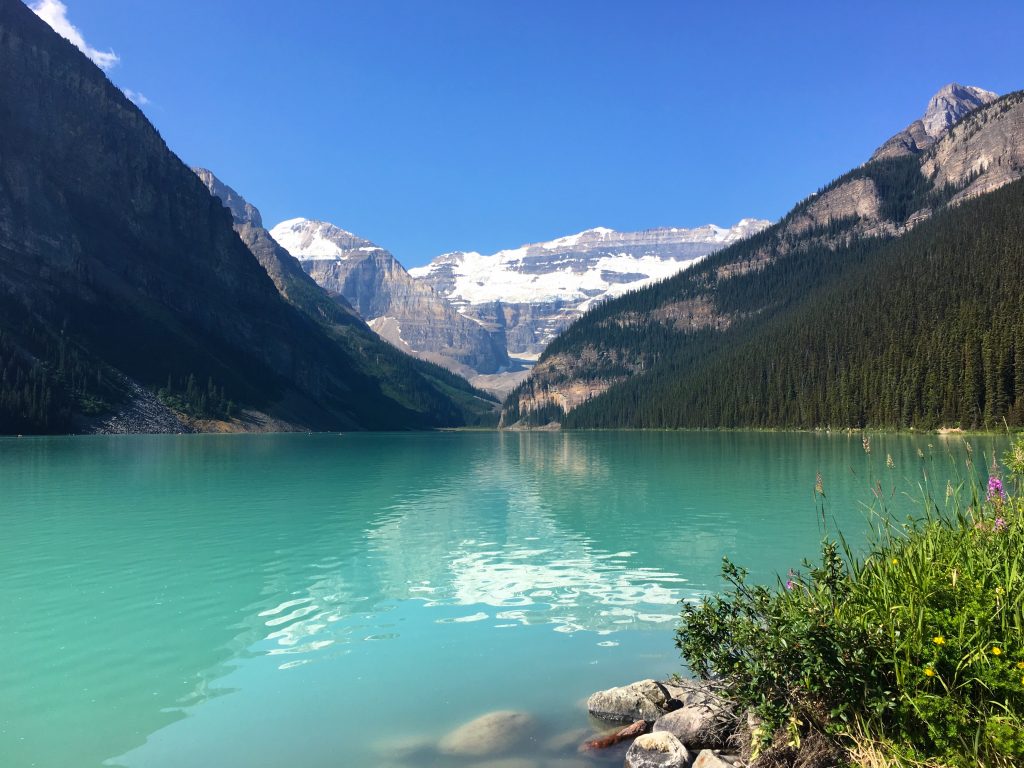
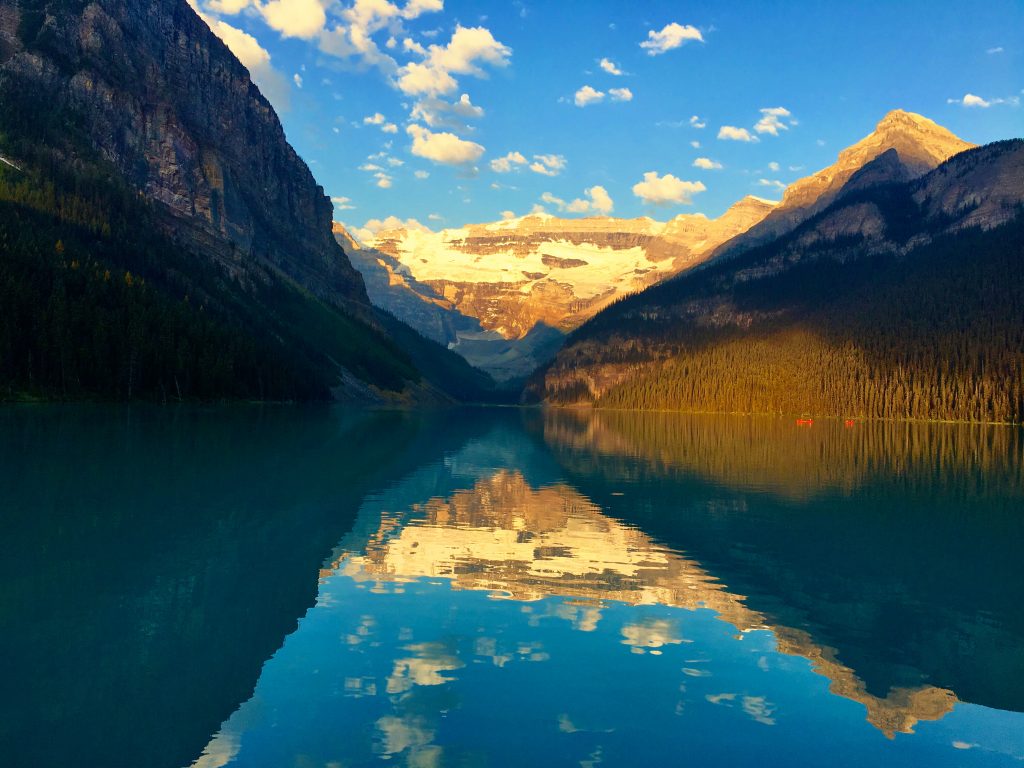
    (2) Lake Louise: When most people think of Banff, they automatically think of Lake Louise.  This place is gorgeous.  The glacial blue lakes and the amazing scenery is breathtaking.  Though be warned, it does come with it’s fair share of tourists as it is easily accessible and next to the Fairmont Hotel. 

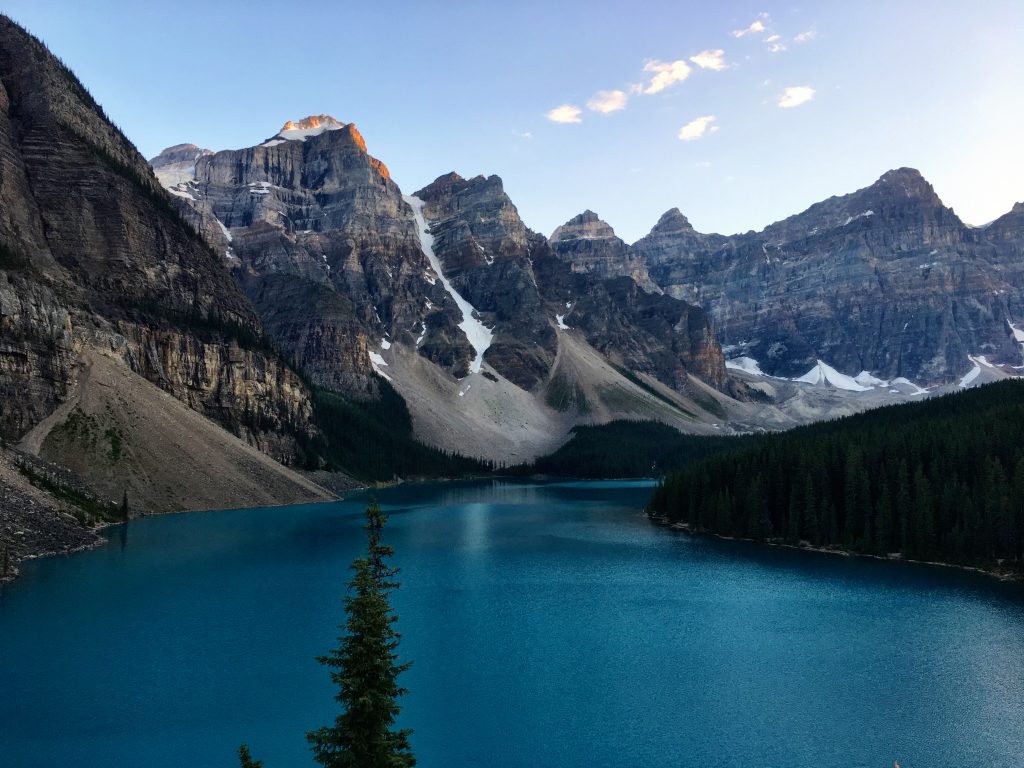
    (2) Lake Moraine: Best viewed at sunset.  We didn’t really make sunset since we ended up climbing a little late.  But oh well. 

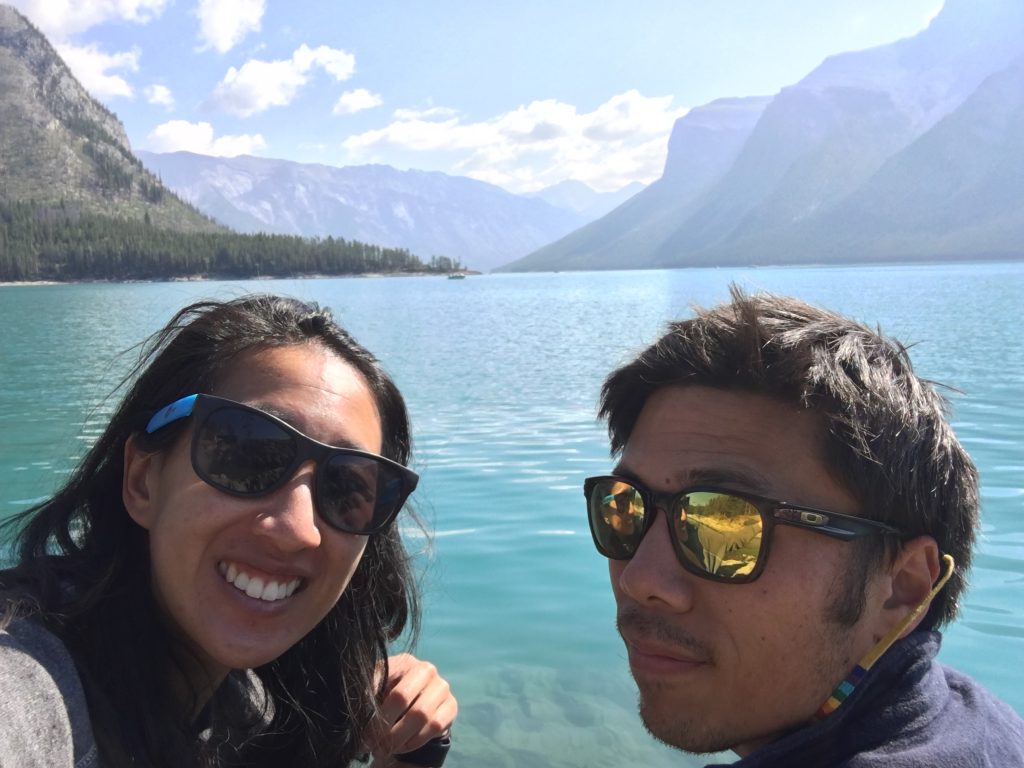
    (3) Lake Minnewanka:  This lake is beautiful and located next to the Two Jacks campground.  NOTE: If you plan to hike further away from the lake, take a note of hiking tips.  There are a lot of huckleberry bushes near the hiking trails which tend to attract bears.  Especially during the August/September months when they are preparing for winter. 

    (4) Town of Banff: Visit the visitor’s center here.  There is also a local farmers market every Wednesday (May to October). 

    (5) Yoho National Park or Jasper National Park:  If you have the time, definitely check out the two other national parks that are really close by!  You can also visit the Athabasca Glacier in the Columbia Icefields.  NOTE:  Going to the glacier requires purchase through a designated tour company(mid April to mid October – weather permitting).  If you decide not to take a tour, definitely consider driving down the Icefields Parkway (Hwy 93).  It’s one of the most beautiful and scenic routes in Canada. 

  • Samaria Gorge

    About Samaria Gorge

    Samaria Gorge is located in the National Park of Samaria, in the White Mountains on the island of Crete.  It is the longest gorge in Greece and one of the largest in Europe.  

    The gorge became a national park in 1962, primarily to protect the Cretan goat also known as the “kri-kri”.  In the gorge you will see the abandoned Samaria Village and the village’s church Óssia María.  It was abandoned in 1962 due to the opening of the national park.  In addition, throughout the gorge you will find Byzantine temples, Christian chapels, Venetian fortresses and World War II shelters.

    It is an extremely popular tourist attraction that requires a full day exploration.  The hike starts near the town of Omalos.  The entrance to Samaria National Park starts at Xyloskalo.  After a 16-Km downhill trek, you will reach the village of Agia Roumeli.  The hike through the national park is 13-Km, however after you exit the park there is still an approximate 3-Km walk to Agia Roumeli.  This town is accessible only via boat.  From Agia Roumeli, all hikers (that are not staying overnight) will take the 1730 ferry.  The main ferry will take passengers to Sougia (westbound).  On the day of our hike, there was no ferry to Sougia so we took the ferry to Chora Sfakion (eastbound) where the tour bus took us back to Chania from there. 

    The Hike

    Trail Location: Samaria National Park – Xyloskalo
    Roundtrip Length: 16-Km: 13-Km through the national park and 3-Km from park exit to Agia Roumeli (About 5-7 hours hike)
    Trailhead (Starting) Elevation:  1250m (~4100 ft)

    After paying 5 Euro for the national park entrance (free for children under 15), the hike will start with approximately 4-Km of non-stop stairs and switchbacks to the gorge floor.  The trail is very well marked. 

    There are also yellow-painted kilometer markers on the hike to let you know how far you have hiked.  The trail is made of limestone and due to the high traffic it receives, some of the rocks are very slippery.  Step carefully especially when going down the “stairs”.  

    Throughout the hike there are well maintained rest areas with benches and/or picnic tables.  Most have fountains where hikers can refill their waters and garbage bins.  Some rest areas also have pit toilets for those that need to relieve themselves. 

    The earlier you hike, the cooler it is.  In addition, the earlier you hike, the shadier the gorge may be.  So timing is important.

    Near the last 2-Km of the hike, you will approach the Gates or “Iron Gates” where the width of the opening is about four meters.  This is the most photographed location of the Samaria Gorge.  

    Directly outside the park exist is a park cafe that sells fresh-squeezed orange juice, beer, and soft-serve ice cream.  Stop here for a quick break and/or snack but keep in mind the village of Agia Roumeli is still ~3-Km away!  A little further from the park cafe is another smaller cafe that offers a minibus ride (for 2 Euro) to Agia Roumeli (~1.1-Km).  It isn’t that much further to walk, so I would recommend walking. 

    In Agia Roumeli, there are are plenty of taverns, restaurants, souvenir shops, and accommodation options including the beach.  From Agia Roumeli, you can take the 1730 ferry to Sougia/Chora Sfakion OR the 0830 (or 1130) ferry the following day. 

    The hike through Samaria Gorge is a full day affair.  It will be extremely difficult for those that have knee injuries as it is a downhill trek almost the entire way.  However it is beautiful and a nice outdoor experience to break up the beach visits and shopping.  As an 8-year old on my tour bus said: “It was easy peasy” and then passed out on the bus to Chania.  🙂 

    Getting to Samaria Gorge

    The only way to visit the gorge is by public bus or traveling with a tour group.  Due to the logistics of the hike, it is not recommended to travel by car or else you will have to backtrack via hiking or bus to retrieve your car. 

    By Public Bus (from Chania): 

    • Check the Bus Timetables to see what time the buses depart. 
    • There are daily buses from Chania Central Bus Station to Omalos (Samaria Gorge) departing at 0745.  The bus should take approximately 1-hr. 
    • You can purchase roundtrip tickets: Chania to Omalos and Sougia to Chania OR Chora Sfakion to Chania at the bus station or make a reservation online.  I believe most take the bus from Sougia.  But both get you back around the same time. 
    • The fare for a round trip bus ticket is €15.30 (as of May 2018). 
    • The fare for the ferry to Sougia or Chora Sfakion is €10 (as of May 2018).  Tickets can be purchased in Agia Roumeli.  Look for the ferry kiosk in town.  Both ferries depart at 1730. 
    • The buses returning to Chania from Sougia or Chora Sfakion depart at 1815 or 1830, respectively.  However, these buses wait for the passengers from the ferry from Agia Roumeli before departure.  

    By Tour Group:  To Take a Tour?  Or Not to Take a Tour? 

    We hiked on May 3, a couple of days after the park opened and during low-season on the island.  The public bus to Omalos was leaving at 0745.  Since we wanted to ensure ample time to explore Agia Roumeli and catch the 1730 ferry, we decided to book a tour with Elafonissos Travel

    • The tour picked us up at our meeting point ~6am (instead of relying on public transit that leaves at 0745). 
    • Took us to a cafe in Omalos where we were able to purchase breakfast (coffee, pastries, juice) and a sandwich for the hike.  In addition, we had the opportunity to use the rest room one last time. 
    • The tour bus was the first tour at the cafe and first tour bus at the national park. 
    • In addition, our tour was the first bus out of the port to Chania. 
    • Compared to other tour sites, it was the cheapest but you might be able to negotiate lower prices in person.  We booked online since we were traveling into Crete that night.  The online booking was quick and they were very communicative about the details of the hike and pick up locations. 
    • If you are staying further from the city center, there are additional fees for pick up and drop off.
    • NOTE: If you do decide to go with a tour and it is low-season, check the tour website as some tours might not be available everyday during the month of May. 

    In hindsight we could have easily taken the public bus and had ample time to explore Agia Roumeli.  Though it was convenient to have a pick up and drop off directly at or near your hotel/stay in Chania.  For those looking to do this hike, I would recommend taking the public bus if you want to save money. 

    What to Bring

    (1) For the Heat:

    • Refillable Water Bottle: At various rest areas there are water fountains that you can use to fill your water bottle.  This is untreated water pumped from the mountain springs.  
    • Sunscreen and a Hat: While hiking through the gorge, there is limited to no shade. 

    (2) Snack(s):  Bring a snack or purchase one in Omalos prior to hiking.  There are no places to purchase a snack or drink during the hike until you reach the park boundaries at the end. 

    (3) Camera

    (4) Cash for entering the national park and riding the ferries.  Each entrance fee is 5 Euro.  The ferry ride is 10 Euro (as of May 2018). 

    (5) Walking Shoes:  If you do not have experience hiking, then shoes with ankle support are more ideal.  

    (6) Trekking Poles (optional): We didn’t use trekking poles, but might be nice if you have knee issues.  Trekking poles are optional and can also be rented through the tour group if you decide to go that direction. 

    (7) Toilet Paper:  There are multiple “toilets” at all of the rest areas.  However, be warned most of these are non-flushing eastern-style pit toilets.  Some had toilet paper, but some did not.  The best toilet we found was at Rest 7 in the abandoned Samaria Village. 

    (8) Swimsuit and Towel (optional):  In Agia Romeli, there is a pebble beach area where you can swim.  The current was quite strong when we visited so we just laid out the towel and took a nap on the beach prior to the ferry. 

    (9) Sandals (optional):  We brought sandals post hike and it felt wonderful to just let them breath. 

    Where to Stay?

    The largest city nearby is Chania.  We stayed in Chania and took a tour.  We didn’t return to Chania until about 2100.  If you like, there are accommodations in Omalos if you would prefer to stay there before your hike or Agia Roumeli if you would prefer to stay there after your hike.  Though staying in Chania is recommended.  We just slept on the bus on the way back. 

    Places to Eat 

    (1) Taverna Tarra:  We got some snacks and beer at this restaurant and everything was delicious!  In addition, if you come early enough you can grab a table on the terrace overlooking the water. 

    (2) Calypso Restaurant:  We didn’t eat here, but the food looks good and the reviews are pretty high. 

    (3) Rousios: This is the first restaurant you walk though as you head towards Agia Roumeli.  There were already quite a few hikers dining at this location, so we decided to walk further towards the water. 

    (4) Hotel Gigilos Omalos:  If you can get coffee and pastries in Chania BEFORE the tour, I would recommend going that route.  However, if you happen to be in our similar situation where we did not have the luxury of purchasing anything prior to our hike you can get orange juice, coffee, croissants, and a ham/cheese sandwich (for lunch) here.  In addition, you can use the toilet here prior to your hike.  NOTE: Most tour groups will stop here prior to the national park entrance so be prepared for long lines for the toilet. 

    Travel Tips 

    (1) Check Dates and Times BEFORE Travel: Samaria National Park is typically open May 1 to October 15, but it is also weather permitting as flash floods and extremely hot weather can lead to closure of the park. 

    (2) Take allergy medicine if you need it!  We visited the gorge in early May and my allergies were on full blast during the hike from the spring flowers. 

    (3) Keep track of your entrance ticket.  You will be required to show your ticket as you exit the park.  

    (4) Use the toilet on the ferry!  It is a long bus ride to Chania and they are not equipped with a toilet.  Use the toilet in Agia Roumeli and/or the ferry! 

    (5) The buses will take you through very windy roads on the islands.  Beware if you get car sick very easily!  

    (6) Bring a refillable water bottle.  You can drink water from the fountains at the rest areas. 

    Good luck!  Have fun! 

  • Meteora

    What is Meteora?

    Meteora is a rock formation located in the western region of Thessaly and contains one of the largest built complexes of Eastern Orthodox monasteries.  The name Meteora means “suspended in the air” or “in the heavens above”.  Meteora was classified as a UNESCO World Heritage Site in 1988. 

    At their peak in the 16th century, there were 24 monasteries in Meteora, but through time only six active monasteries and nunneries remain:

    1. Great Meteoron (Great Meteora)
    2. Monastery of Varlaam
    3. Monastery of Rousanou (Iera Moni Rousanou)
    4. Monastery of the Holy Trinity (Monastery of Agia Triada)
    5. Monastery of Saint Nicholas Anapavsa (Iera Moni Agiou Nikolau Anapavsa)
    6. Monastery of St. Stephen (Monastery of St. Stephanos)

    From St Nicholas Anapafsas Monastery you can still see remnants of previous monastic foundations.

    The rock formation is composed of conglomerate sandstone.  It is theorized that the rock formations were underwater and formed via deposits of stone, sand and mud from streams flowing into the delta.  Then a series of earthquakes caused the seabed to withdraw.  Over millions of years water, wind and extreme temperatures sculpted the area into the rock formations we see today. 

    As early as the 11th century, monks occupied the caves of Meteora.  Monks had the inspiration to construct monasteries on top of these rocks so that they would be closer to god, but the first monastery was not built until the 14th century.  The monasteries can only be reached by long ladders which could be removed whenever the monks felt threatened.  The ropes were replaced, so the story goes, only “when the Lord let them break”. 

    Getting to Meteora from Athens

    (1) Train from Athens (Larissa) to Kalambaka (Cost in April 2018: USD $30.60/pp): For full details on how to book your train tickets visit the Meteora Visitor Travel Site!

    To Kalambaka: Train 884 departs daily from Athens (Larissa) at 0820 and arrives in Kalambaka at 1318 (Duration: 5 hours).  


     To Athens: Train 885 departs daily from Kalambaka at 1732 and arrives in Athens (Larissa) at 2212 (Duration: 5 hours).  

    (2) Bus: Visit the Meteor Visitor Travel site for more details!

    (3) Rent a Car

    Getting Around Meteora

    (1) Bus: The bus starts in Kalambaka then has a couple of stops in Kastriki before continuing to Meteora.  The bus driver will call out the name of the monastery at each stop.  If the monastery is closed for the day it will not make a stop at that location unless requested.  At St Stephens, the bus will wait 1.5 hrs and pick up/drop off in the reverse order.  So if you are at St Nikolai waiting for a return trip home, add some time for the bus to come from St Stephens.  Click here for the Bus Timetable

    (2) Walk:  Walking is the best way to observe the rock formations in the area and at different locations of the road.  The walk from Great Meteora to St Stephens is about 2.6 miles (4.2 km).  Beware, if you do decide to endure the walk there is little to no shade.  We went in late April and it was hot. 

    (3) Rent a Scooter: May require an International Drivers License.

    (4) Rent a Car for the Day

    (4) Take a Tour

    (5) Bike:  Note some of the walkways are slightly uphill. 

    When planning your visit, make sure you check out the monastery hours.  There is typically at least one monastery closed every day of the week except for Saturdays and Sundays.

    What to Bring and Dress Code

    (1) For the Heat: Water, Sunscreen, Hat

    (2) Snack(s):  Bring a snack or eat prior to heading to Meteora.  If you do forget to bring a snack, at every monastery (during open hours) there is a “snack” cart that sells various dry snacks, coffee, soda, and ice cream.

    (3) Camera

    (4) Cash for entering the monasteries.  Each entrance fee is 3 Euro.

    (5) Walking Shoes:  Depending on which monasteries you plan to visit, some have multiple steps to reach the main entrance.  Especially the entrance to Holy Trinity. 

    (6) Toilet Paper:  The monasteries have eastern-style toilets and some are equipped without toilet paper.  Bring your own.

    Dress code: Appropriate clothing is required to visit the monasteries.  For women, shoulders and knees are required to be covered.  All monasteries offer a shawl and/or wrap skirt to borrow at no cost. 

    Where to Stay?

    We stayed at Meteora Central Hostel.  It is a 4min walk away from the Kalambaka Train Station and the bus stop to Meteora is diagonally across the street.  The hostel is owned by a wonderful couple (Stella and George). 

    The hostel is very clean and modern inside.  Each dorm is equipped with multiple bunk beds.  Each bunk has it’s own light, outlet, and curtain.  Compared to the other hostels I’ve stayed in, this one is definitely one of my favorites. 

    We checked out in the morning and the hosts let us leave our luggage in their cafe so we can spend the remainder of the day exploring Meteora before our 17:30 train back to Athens. 

    If a hostel is not your ideal sleeping location, there are plenty of hotels and guesthouses in Kalambaka or Kastriki.

    Places to Eat (Kalambaka)

    (1) Platanos Restaurant: Located next to “Mythos Guesthouse” in Kalambaka.  Service was spectacular and this was a recommendation from our taxi driver!  He even ordered two “tsipouros” for us! 

    (2) Taverna To Paramithi

    Recommended Itinerary from Athens

    “Two” Days in Meteora: 

    Day 1: 

    • Take Train 884 from Athens to Kalambaka at 0820.  Arrive at ~1330. 
    • Check into Meteora Central Hostel
    • Grab a snack (“lunch”) downtown or pack it to go for later. 
    • Take the Bus to Meteora at 1500.  Get off at the first stop (St. Nicholas Anapavsa).  Hike to Great Meteoron.  
      • NOTE:  The monasteries will most likely be closed by the time you arrive. 
    • Walk from Great Meteoron to St. Stephens.  Take pictures along the road as you see fit.  Don’t forget to stop at both Observation Points. 
    • Hitchhike or walk back to Observation Point #1 (“Sunset Point”). 
    • Enjoy your snack or a bottle of wine while watching the sunset
    • Take a taxi back to Kalambaka.  For a taxi, call: +0030 243 202 2310
    • Dinner at Platano’s Restaurant

    Day 2:

    • Check-Out / leave luggage in cafe with Meteora Central Hostel. 
    • Get breakfast downtown.  
    • Take the Bus to Meteora at 0900.  Visit monasteries of your choosing.  We only visited the Great Meteoron. 
    • Head back to Kalambaka via Bus. 
    • Visit the Digital Projection Centre to watch the movie on Meteora. 
    • Lunch at Taverna To Paramithi
    • Souvenir shopping. 
    • Take Train 885 from Kalambaka to Athens at 1732.  Arrive back in Athens at ~2300.  (Long day!)

    Travel Tips 

    (1) Don’t forget to visit the two Observation Points.  The first Observation Point (“Sunset Point”) is commonly visited by photographers and tourists at sunset. 

    (2) If you don’t have an international data plan, download “Kalambaka” via the Google Maps app for offline access.

    (3) Visit the Digital Projection Centre of Meteora’s History and Culture:  The theatre opened in May 2017 and has two shows (~35 minutes total) in 3D (three dimensions) about the history and details of Meteora at no cost!

    (4) If you want to avoid some of the tour bus crowds, start early.

    (5) Bring lots of water.  You can drink water from the tap.

    (6) Train Tips:

    • Be aware of potential Delay: The trains to and from Athens can get delayed.  In some areas there is only one track so a train may be delayed waiting at a station so that an oncoming train can pass.  We were 30 minutes delayed on our train back to Athens from Kalambaka.  Plan accordingly. 
    • When you book you tickets, you will book a train cabin and a seat number.  When getting onto the train, the cabin number will be taped to the door window of the cabin. 
    • If you are taking the train from Athens, ensure you purchase a ticket from “Athens”.  Athens Central Station is also known as “Larissa”.  But you should not be selecting tickets from Larissa as that is actually a different city in Greece. 
    •  You can purchase tickets as early as ~1.5 months prior to departure and up to 48-hours before departure.  However, in high season try to book early especially when traveling over the holidays or on weekends to ensure you get the travel dates you desire. 
  • Banff National Park – Plain of Six Glaciers Trail

    Hike to Plain of Six Glaciers

    Since we were only in Banff for a short period, we only had time to go on one long hike.  We went to the information center in town and decided to hike to the Plain of Six Glaciers.  

    The trail will take you up close to Mount Lefroy, Mount Victoria and the Victoria Glaciers (Upper and Lower).  After you finish your hike, you can order a hot tea and various snacks at the teahouse at the top.  Most hikers take the trail to the Lake Agnes Tea House, but the Plain of Six Glaciers teahouse is a little less populated due to the longer hike.  

    Trail Location: Lake Louise
    Roundtrip Length: 9.4 miles (14.2 km)
    Trailhead (Starting) Elevation: 1,380 ft (420 m)
    Trail Total Elevation Gain: 1,215 ft (370 m)
    Highest Elevation: 6,890 ft (2.1 km)

    The trailhead starts at Lake Louise.  

    To avoid crowds and the summer heat, we started our hike at 7am.  It was perfect timing because we managed to catch Lake Louise at sunrise and it was beautiful!  Unsurprisingly, there were already crowds of tourists at the lake at this time.  As we hiked the trail towards the back of the lake, the crowds lightened leaving just us to hike towards the plain of six glaciers. 

    I took approximately ~1.5 hours to reach the teahouse.  Since it wasn’t open yet, we decided to hike the additional 1.4km to the Plain of Six Glaciers lookout to get a closer look.  As we approached the teahouse, we heard a loud rumble and saw a snowmelt fall off the Upper Victoria Glacier.  This is a common occurrence during the early summer months, but we were lucky to experience it.  

    We were the first ones there so we had the lookout all to ourselves!  

    We ended up not eating at the teahouse because I left my wallet in the car and we did not have any cash.  🙁  Next time!   At the teahouse, we saw multiple helicopter drop offs and pick ups at the teahouse to stock supplies and pick up waste.  

    Since it was still early in the day, we decided to grab our climbing gear.  There is a lot of rock climbing in the back of Lake Louise, so we used the remainder of the day to climb.  

    This was definitely one of my favorite hikes and my favorite national park from the first leg off our road trip.  I will definitely be back to Banff National Park since there is so much more of the park I have not explored.  In addition, I didn’t even get to visit Yoho or Jasper National Park, so those will definitely be on the next trip’s itinerary. 

    TIPS Before You Go

    1. Start early to avoid crowds and get parking.  Lake Louise is a popular destination so parking can be limited if you go in the afternoon or on a weekend.  In addition, it can be hot hiking in the summer months. 
    2. Teahouse:  If you wish to go, check the hours of operation as it is only open seasonally depending on the conditions.  In addition, bring cash!
    3. Do you need bear spray?  We didn’t bring it. The hike is very popular and gets enough traffic to scare away all of the wildlife.  But I would leave it up to your own comfort level if you think you need to bring bear spray or not.  
    4. Bring a light jacket.  You won’t need it going uphill, but if you decide to take the additional hike to the lookout it is a little cooler and more exposed. 
  • #vanlife

    This picture was taken the first day we brought the van home and probably the first day in a long time that I had seen a smile from Terence.  It was also taken exactly one month after two of our close friends passed away in a car accident.

    On this day, I distinctly remember meeting Terence at the car dealership because our ordered Sprinter van had arrived (after ~4 months of waiting).  I approached the van and he opened the sliding door with this huge grin on his face, conveniently wearing his “Explore More” shirt.  In that moment, he was happy.  A happiness I had not seen in a while.

    “I don’t know anyone who has been handed only roses. We all encounter hardships. Some we see coming; others take us by surprise…The question is: When these things happen, what do we do next?” 
    ― Sheryl Sandberg, Option B: Facing Adversity, Building Resilience, and Finding Joy

    That summer we really spent our heart and soul into building out the van.  In hindsight, building out the van was kind of like therapy to help us cope through the grief – especially for Terence.  He dedicated all of his time and attention into the van that summer.  It could be therapy in good ways or in bad.  Terence has a way of bottling up his feelings so building the van together was not always easy.  The grief and anger had its way of showing every once in a while.  We had plenty of standard arguments over little things and a lot of “I told you so’s”.  But when it was finished, it was an amazing feeling.  I marvel everytime I look at our finished product and think “I can’t believe we built that”.

    We had always talked about taking this road trip and putting our working lives on pause. But this decision was not made without quite a bit of hesitation.  How are we going to make money?  What about health insurance?  For myself, I was even more inspired to discover more meaning in life.  Losing a loved one is a painful reminder that life is short.  It took a while, but Terence and I decided we would leave California the place we were born and grew up to and take the time to experience life together and enjoy the beauty of what North America has to offer us.

    We lived in the van for approximately six months while working before we started our road trip.  We gave up our Bay Area peninsula apartment, sold/donated most of our possessions, stored some items in our parents house, and saved >$11K (rent money) before we started our trip.

    A couple of days before my last day at work, I got a fortune that said: “As soon as you feel too old to do a thing, do it.”  We are currently six months into our trip and this life decision is definitely one I do NOT regret.

    -nicole

  • Rocky Mountain National Park

    There are so many activities you can do at Rocky Mountain National Park.  We didn’t spend much time here, but managed to take the scenic drive on Trail Ridge Road and hike to Chasm Lake. 

    Trail Ridge Road

    In July 2017, we took a three-day rest weekend from climbing to explore Denver and Boulder.  We were headed back to Rifle Mountain Park for some more climbing and decided to drive through Rocky Mountain National Park on the Trail Ridge Road (East to West).  If you plan to use this road, be sure to check the National Park Service website for current conditions as this road is only open through the summer and fall months due to the high elevation.  

    The night before, we stayed on a National Forest Service Road about one hour away from Estes Park.  It was easily accessible in our van and there were two other parties camping there.  

    The Trail Ridge Road Scenic Drive is approximately 48 miles long and extends between Estes Park (East side) and Grand Lake (West side).  At various locations of the scenic drive, there are several marked pullovers where you can see the Rocky Mountain range including Long’s Peak.  Long’s Peak is the highest point in the park at 14,255 ft (4345m).  The drive takes you through the montane forests, subalpine forests and alpine tundra levels. 

    At some point in the drive, the highway travels above the treeline at an elevation at >11,000 feet to the alpine tundra level (“land of no trees”).  At this elevation, it is normally windy and can be 20 to 30 degrees colder than Estes Park or Grand Lake, so dress accordingly.  If you do hike around here, stay on the trails to protect the plant communities.  

    This scenic drive is beautiful and is a great option for travelers who do not have much time to explore the park.  Leave at least a half day for the drive.  Longer, if possible.  

    We did this drive on a Sunday at the end of July.  Some of the pullovers took a while to find a parking spot.  In addition, we had to skip the Alpine Visitor Center because the parking lot was full.  I was extremely disappointed.  My recommendation is not to drive this route on the weekend as your might avoid some headaches and crowds on a weekday. 

    We tried to stop at “Miyauchi Snack Bar” at Grand Lake for some ice cream, but the line was incredibly long.  Luckily, we found a small coffee window that also sold limited flavors of Miyauchi ice cream with no line! 

    Hike to Chasm Lake

    On our way towards Wyoming, we decided to stop by Rocky Mountain National Park again.  Since we had only taken the scenic drive, there was so much more to the park we wanted to explore.  A friend had recommended the hike to Chasm Lake: 

    Trail Location: Longs Peak Ranger Station
    Roundtrip Length: 8.5 miles (~4 hours)
    Trailhead (Starting) Elevation: 9,405 feet
    Trail Total Elevation Gain: 2,500 feet
    Highest Elevation: 11,823 feet

    Due to the potential of a lightening rain storm, we started our hike ~5:30am and we made it to Chasm Lake in 2 hours (~4 hours roundtrip).  I would recommend starting this hike earlier in the day as majority of the trail is exposed with little shade.  As we were hiking up, there were a couple of parties already hiking down.  When we reached the lake, there were no other parties in sight.  Hiking back down to the ranger’s station, there were multiple parties hiking up in the summer sun.  

    Be sure to check the NPS website for trail conditions.  There was a “snowpack” on the trail.  Some recent hikers recommended using trekking poles to get by, but we decided to just wing it.  It was not difficult to cross the snowpack, but we did the hike the first week of August.  I’d imagine crossing this snowpack earlier on in the summer might have been more difficult.  If you’re really up for it, I’d recommend continuing the hike to the top of Long’s Peak!

    Following the hike, we stopped by the Long’s Peak Rangers Station to get some cancellation stamps.  Next time we go to Rocky Mountain Park I’d like to hike to the top of Long’s Peak as my first 14’er.  Till next time…

  • #vanlife

    First Leg: Exploring the “Pacific Northwest”

    First Leg Summary

    Length: 3 months (June to September 2017)

    Miles: >4.5K miles

    Total Number of Climbing Days: ~60 of 90

    Total Number of Climbing Destinations: 6 (Rifle Mountain Park, Tensleep Canyon, Banff National Park, Squamish B.C., Little Si – Exit 32, Smith Rock State Park)

    Total Number of National Parks5 (Rocky Mountain National Park, Yellowstone National Park, Glacier National Park, Banff National Park, Crater Lake National Park)

    Highlights: Banff National Park was my favorite.  We hiked on the Plain of Six Glaciers Tea House trail.  

    Second Leg: Exploring the “Southeast” and “Southwest”

    Second Leg Summary

    Length: 5 months (September 2017 to February 2018)

    Miles: >7.0K miles

    Total Number of Climbing Days: ~65 of 132

    Total Number of Climbing Destinations: 4 (Red River Gorge, New River Gorge, Chattanooga, Red Rock Canyon)

    Total Number of National Parks3 (Arches National Park, Canyonlands National Park, Grand Canyon National Park)

    Highlights: Climbing in Red River Gorge and the first time climbing in the New and Chattanooga.  Terence frequently reminds me how much he misses climbing on the Southeast sandstone.  Also I can’t forget the deep fried peach tarts in Colorado and the BBQ in Kansas City, Kansas (our favorite!).  

    Third Leg: Exploring Nevada and Southern Utah

    Third Leg Summary

    Length: 2 months (February to April 2018)

    Miles: >1.7K miles

    Total Number of Climbing Days: ~36 of 60

    Total Number of Climbing Destinations: 3 (Red Rock Canyon, Lime Kiln Canyon (“The Grail”), Hurricave)

    Total Number of National Parks2 (Zion National Park, Bryce Canyon National Park)

    Highlights:  Sending my second 5.13a! 

    Fourth Leg: Eurotrip to Greece and Spain (#notvanlife)

    Fourth Leg Summary

    Length: 1.5 months (April to May 2018)

    Miles: >400 miles (~681 Km)

    Total Number of Climbing Days: ~13 of 45

    Total Number of Climbing Destinations:  1 (Terradets “Les Bruixes”)

    Highlights:  Sending my third 5.13a! 

    Fifth Leg: “Last” Leg (Squamish) and Tahoe

    Fifth Leg Summary

    Length: June 2018 to November 2018

    Miles: >2.1K miles

    Total Number of Climbing Days: A lot…

    Total Number of Climbing Destinations: Too many to count (Squamish B.C, Tahoe (Mayhem Cove, Donner Summit, Lots of Bouldering)

    Highlights:  Spent the summer sport climbing, bouldering, and performing house renovations on our South Lake Tahoe Cabin.  Sent my fourth and fifth 5.13a! 

    SUMMARY

    In 2019, Terence and I returned back to work.  We’re still living 100% in the van, but working Mon-Fri and taking weekend warrior trips in the van. Since we’ve returned, Terence sent his mega project at our local crag and snagged his first FA.  I also sent my first 8A (5.13b) and we are waiting for the day we can take a similar extended road trip again.